Part 1: Key Techniques
While the Basic Loaf recipe is designed for minimal fuss, understanding a few key techniques can help you get consistently great results.
Stretch & Folds (Optional Strength Builders)
You see these mentioned a lot. They aren't strictly necessary for this recipe, but they can help if you want to get technical.
What are they?
Essentially, instead of traditional kneading, stretch and folds are a gentle way to develop gluten strength and structure in your wet sourdough dough. You're literally stretching a portion of the dough up and folding it over the rest.
Why do them?
They help create a strong gluten network which can trap the gas produced by the yeast, leading to a taller loaf with a potentially more open crumb structure (bigger holes). They incorporate air and equalize the dough temperature. The good news is that each set only takes about 30 seconds, so while optional, it doesn't add much hands-on time if you decide to try it.
Do I need to do them for the Basic Loaf recipe?
Honestly? No. This recipe is designed to work well with minimal handling, relying on the long, slow bulk fermentation to develop sufficient gluten. However, if you have the time and want to experiment, performing 2-4 sets during the first few hours of bulk fermentation (as mentioned in the recipe) can give your loaf a little extra boost in structure and height. It's totally optional though – don't feel pressured!
How to do a simple set:
- Wet your hands slightly to prevent sticking.
- Reach under one side of the dough in the bowl.
- Gently stretch that portion upwards (without tearing it) and fold it over the top of the main dough mass towards the opposite side.
- Rotate the bowl about 90 degrees (a quarter turn).
- Repeat the stretch and fold (reach under, stretch up, fold over).
- Repeat twice more, rotating the bowl each time, so you've stretched and folded from all four "sides".
- That's one "set" done! Cover the bowl and wait 45-60 minutes before doing another set, if you choose to.
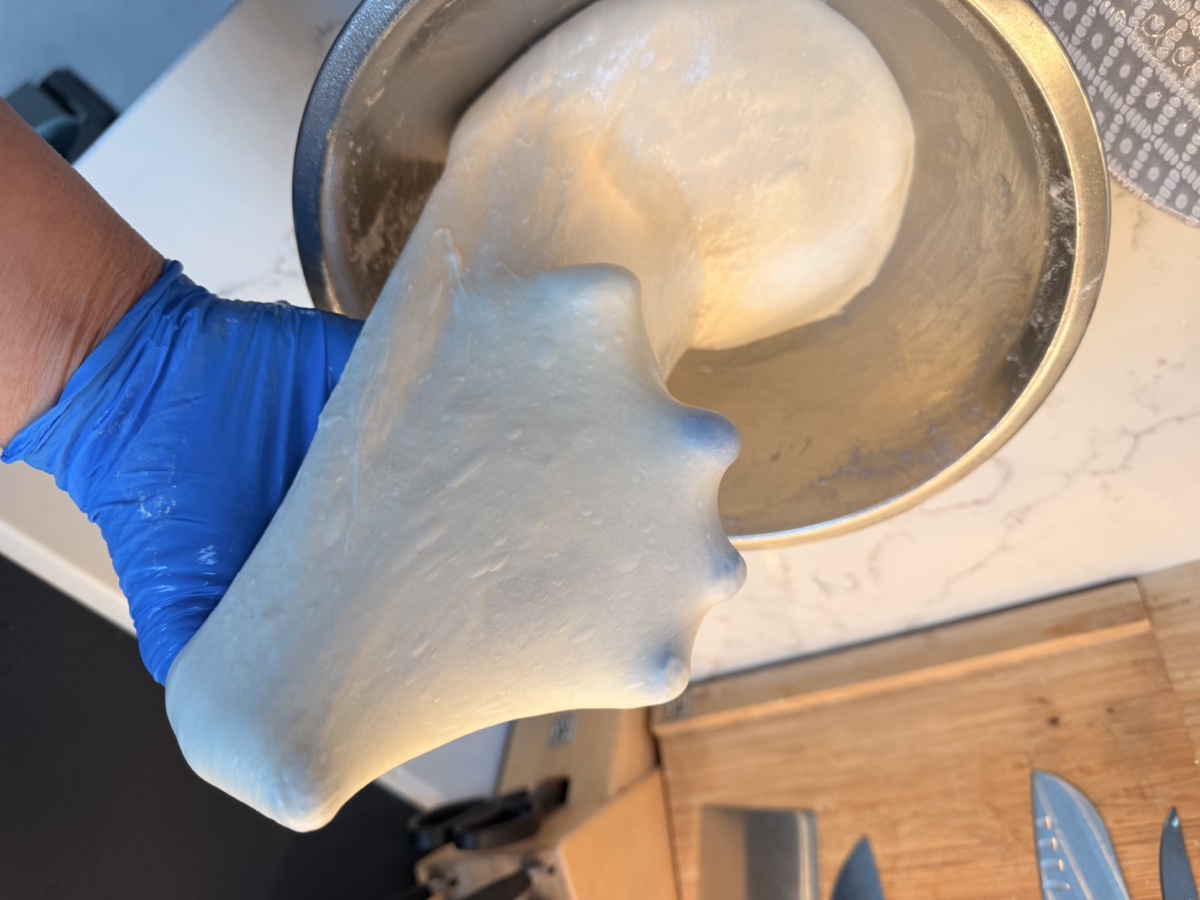
The Windowpane Test
Once you've done two or more sets, the windowpane test is the most reliable way to check whether your gluten is developed enough to stop. Pinch off a small piece of dough and gently stretch it between your fingers. You're looking for it to thin out into a semi-translucent membrane without tearing. If you can hold it up and nearly see light through it, your gluten is in good shape and you can leave the dough to finish bulk fermenting. If it tears straight away, give it another set and check again in 30-45 minutes.
Shaping Your Loaf (Building Tension)
Shaping isn't just about making it round. It's about creating "surface tension" - tightening the outer skin of the dough so it holds its shape and rises upwards in the oven.
Here's a simple method based on a letter fold, which works as a base for both round (boule) and oval (batard) loaves:
- Prepare Surface: Lightly flour your work surface. Lightly is key – too much flour prevents the dough from sticking to itself, making it harder to build tension.
- Tip Out Dough: Gently tip your fermented dough out of its bowl onto the floured surface. Try to keep the bubbly side up if possible.
- Initial Shape & Degas Gently: Gently press the dough out into a rough square or rectangle. Don't knock all the air out, just gently spread it.
- Letter Fold: Imagine the rectangle divided into three vertical sections. Fold the top third down over the middle third. Then, fold the bottom third up over the folded top third (like folding a business letter). You now have a smaller, thicker rectangle or square.
- Final Shape - Option A (Boule/Round): Follow steps for folding sides in and rotating to form a tight ball.
- Final Shape - Option B (Batard/Oval): Roll up the letter-folded dough tightly into a log.
- Transfer to Banneton: Place shaped dough seam-side UP into your prepared banneton/bowl.
Scoring Your Loaf (Keep it Simple!)
Scoring is making a deliberate cut on the top of your dough just before it goes into the oven. Why bother? It controls the rise and looks good!
The Simple Method:
- Tool: Use something very sharp (lame, razor, sharp knife).
- Timing: Score cold dough right before baking.
- The Cut: Make one single, confident slash (straight or curved) about 1-2 cm (1/2 inch) deep. Hold blade at a slight angle.
- Confidence is Key: Be decisive to avoid dragging.
One simple score is all you need for a great result!
Freezing Sourdough Bread (Yes, You Can!)
Baked too much? Or just want to save some for later? Sourdough freezes surprisingly well! The key is to do it properly to maintain quality.
Important First Step: Cool Completely!
Never freeze warm bread. Let your loaf cool completely on a wire rack (at least 2-4 hours, maybe longer) before wrapping and freezing. Freezing warm bread traps moisture leading to ice crystals and a potentially soggy thawed loaf.
Method 1: Freezing the Whole Loaf
- Best For: Preserving the overall moisture and texture if you plan to use the whole loaf within a day or two after thawing.
- How: Once completely cool, wrap the loaf tightly. Double wrapping is best: first in cling film, then in a layer of aluminium foil or placed inside a large, airtight freezer bag. Squeeze out as much air as possible.
- Thawing: Leave wrapped at room temperature for several hours or overnight. To refresh the crust, you can spritz it lightly with water and pop it into a hot oven (around 180-200°C / 350-400°F) for 5-10 minutes.
Method 2: Freezing Slices
- Best For: Convenience! Perfect for grabbing individual slices for toast whenever you fancy.
- How: Once completely cool, slice the entire loaf. To prevent slices sticking together, you can place squares of parchment paper between them, or lay them flat on a baking sheet to freeze individually first before transferring to a freezer bag. Ensure the freezer bag is airtight.
- Thawing/Using: No need to thaw! You can toast slices directly from frozen. They might need slightly longer in the toaster.
General Tips:
- Wrap bread tightly and use airtight containers/bags to prevent freezer burn.
- Label and date your frozen bread.
- For best quality, use within 1-3 months. It's still safe after that but might lose some texture or flavour.
